Batch Inference on Fine Tuned Llama Models with Mosaic AI Model Serving

Summary
- Learn how to serve fine-tuned Llama 3.1 and 3.2 variants with Provisioned Throughput
- Learn how to perform batch inference on LLM endpoints using ai_query
- Learn how to evaluate LLM generated results using mlflow.evaluate
Introduction
Building production-grade, scalable, and fault tolerant Generative AI solutions requires having reliable LLM availability. Your LLM endpoints must be ready to meet demand by having dedicated compute just for your workloads, scaling capacity when needed, having consistent latency, the ability to log all interactions, and predictable pricing. To meet this need, Databricks offers Provisioned Throughput endpoints on a variety of top performing foundation models (all major Llama models, DBRX, Mistral, etc). But what about serving the newest, top performing fine-tuned variants of Llama 3.1 and 3.2? NVIDIA’s Nemotron 70B model, a fine-tuned variant of Llama 3.1, has shown competitive performance on a wide variety of benchmarks. Recent innovations at Databricks now allows customers to easily host many fine-tuned variants of Llama 3.1 and Llama 3.2 with Provisioned Throughput.
Consider the following scenario: a news website has internally achieved strong results using Nemotron to generate summaries for their news articles. They want to implement a production grade batch-inference pipeline that will ingest all new articles for publication at the beginning of each day and generate summaries. Let’s walk through the simple process of creating a Provisioned Throughput endpoint for Nemotron-70B on Databricks, performing batch inference on a dataset, and evaluating the results with MLflow to ensure only high quality results are sent to be published.
Preparing the Endpoint
To create a Provisioned Throughput endpoint for our model, we must first get the model into Databricks. Registering a model into MLflow in Databricks is simple, but downloading a model like Nemotron-70B may take up a lot of space. In cases like these it is ideal to use Databricks Volumes which will automatically scale in size as more disk space is needed.
After the model has been downloaded we can easily register it into MLflow.
The task parameter is important for Provisioned Throughput as this will determine the API that is available for our endpoint. Provisioned throughput can support chat, completions, or embedding type endpoints. The registered_model_name argument will instruct MLflow to register a new model with the provided name, and to begin tracking versions of that model. We’ll need a model with a registered name to set up our Provisioned Throughput endpoint.
When the model is finished registering into MLflow, we can create our endpoint. Endpoints can be created through the UI or REST API. To create a new endpoint using the UI:
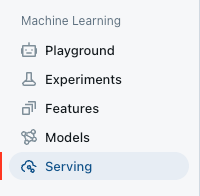
- Navigate to the Serving UI in your workspace.

- Select Create serving endpoint.

- In the Entity field, select your model from Unity Catalog. Type in our model name
“ml.your_name.nemotron”.
- You can then select the throughput band desired. We’ll leave this at defaults for now.
- Give your model a name (like “nemo_your_name”), and save your endpoint.
Batch Inference (with ai_query)
Now that our model is served and ready to use, we need to run a daily batch of news articles through the endpoint with our crafted prompt to get summaries. Optimizing batch inference workloads can be complex. Based upon our typical payload, what is the optimal concurrency to use for our new nemotron endpoint? Should we use a pandas_udf or write custom threading code? Databricks’ new ai_query functionality allows us to abstract away from the complexity and focus simply on the results. The ai_query functionality can handle individual or batch inferences on Provisioned Throughput endpoints in a simple, optimized, and scalable manner.
To use ai_query, build a SQL query and include the name of the provisioned throughput endpoint as the first parameter. Add your prompt and concatenate the column you want to apply it on as the second parameter. You can perform simple concatenation using || or concat() or you can perform more complex concatenation with multiple columns and values, using format_string().
Calling ai_query is done through Pyspark SQL and can be done directly in SQL or in Pyspark python code.
The same call can be done in PySpark code:
It’s that simple! No need to build complex user defined functions or handle tricky Spark operations. As long as your data is in a table or view, you can easily run this. And because this is leveraging a provisioned throughput endpoint, it will automatically distribute and run inferences in parallel, up to the endpoint’s designated capacity, making it much more efficient than a series of sequential requests!
ai_query also offers additional arguments including return-type designation, error-status recording, and additional LLM parameters (max_tokens, temperature, and others you would use in a typical LLM request). We can also save the responses to a table in Unity Catalog quite easily in the same query.
Summary Output Evaluation with MLflow Evaluate
Now we’ve generated our news summaries for the news articles, but we want to automatically review their quality before publishing on our website. Evaluating LLM performance is simplified through mlflow.evaluate(). This functionality leverages a model to evaluate, metrics for your evaluation, and optionally, an evaluation dataset for comparison. It offers default metrics (question-answering, text-summarization, and text metrics) as well as the ability to make your own custom metrics. In our case, we want an LLM to grade the quality of our generated summaries, so we will define a custom metric. Then, we’ll evaluate our summaries and filter out the low quality summaries for manual review.
Let’s take a look at an example:
- Define custom metric via MLflow.
- Run MLflow Evaluate, using the custom metric defined above.
- Observe the evaluation results!
The results from mlflow.evaluate() are automatically recorded in an experiment run and can be written to a table in Unity Catalog for easy querying later on.
Conclusion
In this blog post we’ve shown a hypothetical use case of a news organization building a Generative AI application by setting up a popular new fine-tuned Llama-based LLM on Provisioned Throughput, generating summaries via batch inference with ai_query, and evaluating the results with a custom metric using mlflow.evaluate. These functionalities allow for production-grade Generative AI systems that balance control over which models you use, production reliability of dedicated model hosting, and lower costs through choosing the best size model for a given task and only paying for the compute that you use. All of this functionality is available directly within your normal Python or SQL workflows in your Databricks environment, with data and model governance in Unity Catalog.
Never miss a Databricks post
What's next?

Data Science and ML
June 12, 2024/8 min read
Mosaic AI: Build and Deploy Production-quality AI Agent Systems

Data Science and ML
October 1, 2024/5 min read