Implementing a RAG chatbot using Databricks and Pinecone

Imagine giving your business an intelligent bot to talk to customers. Chatbots are commonly used to talk to customers and provide them with help or information. But, the usual chatbots sometimes struggle to answer complicated questions.
What is RAG?
Retrieval Augmented Generation (RAG) is a method that makes chatbots better at understanding and responding to tough questions. This Generative AI design pattern combines large language models (LLMs) with external knowledge retrieval. It allows real-time data to be integrated into your AI applications during the generation process (inference time). By providing the LLM with this contextual information, RAG significantly improves the accuracy and quality of the generated outputs.
Here are some of the benefits of using RAG:
- Improved accuracy and quality of AI applications: By providing real-time data as context to the LLM, RAG can improve the accuracy and quality of AI applications. This is because the LLM has access to more information, which it can use to generate more informed and relevant responses.
- Ability to handle different types of data: RAG can handle different types of data, including unstructured data like documents and emails and structured data like tables. This makes it a versatile tool that can be used in a variety of applications.
- More dynamic and flexible responses to user queries: RAG can generate more dynamic and flexible responses to user queries, such as limiting responses based on user interests or data access controls. This makes RAG chatbots more engaging and helpful for users, with security controls.
- Reduced up-front costs and faster development: RAG can be deployed quickly and easily without extensive development work or LLM fine-tuning.
Databricks and Pinecone
Pinecone's vector database excels at managing complex data searches with pinpoint accuracy, while the Databricks Data Intelligence Platform streamlines the handling and analysis of vast datasets.
The integration with Pinecone is seamless, enabling Databricks to efficiently store and retrieve vector embeddings at scale. This integration simplifies the development of high-performance vector search applications that leverage Pinecone and Databricks.
Using Databricks and Pinecone together, you can create a more accurate and efficient chatbot than traditional chatbots.
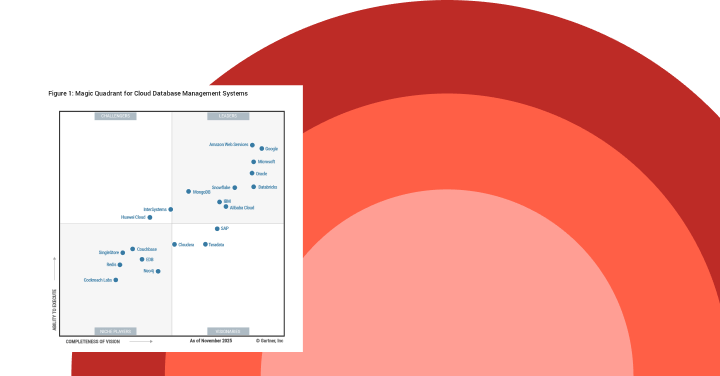
Gartner®: Databricks Cloud Database Leader
Step-by-Step Implementation
In this blog, we walk you through building a chatbot that can answer any questions around Databricks, by leveraging Databricks documentation and whitepapers.
There are four key stages required in building a chatbot. The first stage is ingesting and data preparation. The next stage is storing the data in a vector database like Pinecone, for efficient information retrieval. The third stage is to set up a RAG retriever and chain that uses Pinecone for retrieval and an LLM like Llama 3.1 to generate responses. The final stage is registering the chatbot to Databricks Unity Catalog and deploying it via Databricks Databricks Model Serving. Continue reading for a step-by-step walkthrough of this process.
Step 1: Prepare Data with Databricks
- Ingest raw files located on cloud storage using Databricks Autoloader.
We use Databricks autoloader, which offers a hands-off approach that automatically processes new files as they land in cloud storage, ensuring efficiency and fault tolerance without the need for manual state management. Databricks Autoloader is designed to scale to billions of files, and is cost-effective, leveraging native cloud APIs for file discovery to keep costs in check. Moreover, Auto Loader is intelligent, with built-in schema inference and evolution capabilities that adapt to schema changes. Whether you're dealing with high volumes of data or require near-real-time ingestion, Auto Loader helps simplify and accelerate the data ingest process. Streaming tables provide a much more simplified experience, especially for handling streaming or incremental data processing. - Extract the text from the pdf / html files.
First, we need to transform the byte content of PDF files into readable text and retrieve specific segments from the text. In this reference implementation, we leverage the PyPdf or UnstructuredIO libraries with a Spark UDF to simplify the text extraction process. We also use a text splitter to break the text into manageable chunks. - Create vector embeddings and save them to a Delta table.
For creating the vector embeddings, we use the BGE embedding model available via Databricks Mosaic AI Foundational Model API. A Python UDF computes the embeddings using the foundational model endpoints. The extracted data from the PDFs and embeddings are then stored in a Delta table.
Step 2: Store Data in a Pinecone vector database
- Initialize Pinecone client configs.
When you upsert vector embeddings into Pinecone, you'll first create an index. An index is a group of embeddings with the same number of dimensions and typically represents the underlying dataset for similar types of use cases. Log in to Pinecone to create a Pinecone API key.
Databricks Secrets securely manage and store sensitive information such as passwords, API keys, and other credentials that you may need to use within your Databricks notebooks, jobs, and data pipelines. We use Databricks secrets to store sensitive information like the Pinecone API key and other required credentials.
The below shows how you can retrieve sensitive information, such as the Pinecone API key, using Databricks secrets. Then, using your Pinecone API key and environment, initialize your client connection to Pinecone. - You then create a Pinecone index either using the Pinecone UI or the API.
- Transform data to the schema required by Pinecone.
Pinecone lets you attach metadata key-value pairs to vectors in an index. This can be used to store the original document and its metadata and to specify additional filter expressions. Before we can write to Pinecone, we transform the data from the delta table by adding a metadata column that captures the content/snippet of the original document and additional metadata like document source and ID, in accordance with Pinecone's schema requirements. - Write to the Pinecone index.
Install the Pinecone spark connector as described in the documentation. We use the Pinecone spark connector to write the embeddings to the Pinecone index. Note that mode "append" allows us to augment the index with new data as well.
Step 3: Query the Pinecone vector database
We then can query the Pinecone vector index, using the query API. This API takes the question embedding as input.
Querying Pinecone directly via the API allows you to integrate Pinecone and Databricks into arbitrary code.
In the next section, we show how to simplify this workflow using the popular LangChain framework.
Step 4: Query a Pinecone vector database using LangChain
Langchain is a framework that simplifies building applications powered by LLMs (large language models). Its Databricks Embeddings help simplify interacting with embedding models, and its integration with Pinecone provides a simplified query interface.
Langchain wrappers make it easy, by handling all the underlying logic and API calls for you. The LangChain code below abstracts away the need to explicitly convert the query text to a vector.
Step 5: Create a retriever for Pinecone and LangChain
Above, we showed how to do a similarity search on our Pinecone vector index. To create a RAG chatbot, we will use the LangChain Retriever interface to wrap the index.
We first initiate Pinecone to set the API key and environment. Then, we create a VectorStore instance from the existing Pinecone index we created earlier, with the correct namespace and keys.
Step 6: Assemble the chatbot chain
Now, we can put the retriever into a chain defining our chatbot!
Let's see if our chatbot can correctly extract the question from the chat messages and retrieve relevant context from Pinecone.
Step 7: Deploy the chatbot as a model
As we iterate on our chatbot, we will want to track model objects, model versions, and metadata, as well as manage access controls. For that, we will use MLflow's Model Registry, integrated with Unity Catalog.
You can register the chatbot chain as a model using mlflow.langchain.log_model, with the Unity Catalog. The signature of the model can be inferred using infer_signature in mlflow. Remember to put pinecone-client into the dependencies. Set "mlflow.models.set_model(model=full_chain)" in the notebook where you defined the chain. In a new driver notebook, register the chatbot and deploy chatbot to Model Serving.
The model is registered with Databricks Unity Catalog, which centralizes access control, auditing, lineage, and discovery for all data and AI assets.
Step 8: Deploy the chatbot to Databricks Model Serving
Now let's deploy the chatbot chain mode as a Model Serving endpoint. Below, we put PINECONE_API_KEY and DATABRICKS_TOKEN into the environment variables as the serving endpoint will use them to talk to Pinecone and Databricks Foundation Models. This allows us to grant access to the served model, without revealing these secrets in code or to users.
The Model Serving UI provides real-time information on the health of the model being served.
Step 9: Test your chatbot
After deploying the chatbot, you can test it with a REST API or Databricks SDK.
You can also test it using the Query UI available as part of model serving.
Next steps
Improve your customer service with Databricks and Pinecone by deploying cutting-edge RAG chatbots. Unlike traditional bots, these advanced chatbots leverage the Databricks Data Intelligence Platform and Pinecone's vector database to deliver precise, timely responses. They rapidly sift through vast data to find the exact information needed, providing customers with accurate answers in seconds. This not only elevates the customer experience but also sets a new benchmark for digital engagement.
For business leaders, embracing this technology is more than just an upgrade—it's a strategic move to lead in customer service innovation. By adopting data-driven, intelligent solutions, you can place your business at the forefront of customer engagement, showcasing a commitment to excellence that resonates with your audience.
Check out our free training to learn more about Generative AI with Databricks, and read additional Pinecone and Databricks documentation here. Access sample notebooks from this blog here.