From Zero to GenAI Hero: Building Your GenAI App with HuggingFace and Databricks
Integrate HuggingFace models with Databricks tools to design, train, and deploy your GenAI app effortlessly

Summary
- Utilize Unity Catalog for data management and governance, integrating your organization's data with Hugging Face models to create tailored GenAI solutions that align with your specific business needs.
- Employ Databricks Model Serving to deploy and manage your custom GenAI models, taking advantage of its seamless integration with Unity Catalog and support for both open-source and third-party models, including those from Hugging Face.
- Leverage Databricks Apps to create and deploy user-friendly interfaces for your GenAI applications directly on the Databricks Platform, streamlining the development process and eliminating the need for extensive web development expertise.
Databricks introduced last year Databricks Apps, completing its suite of tools that allows users to create and deploy applications directly on the Databricks Platform. With Databricks Apps, developers can build and launch data and AI applications faster, more securely, and with seamless integration into the Databricks Data Intelligence Platform. Supporting popular frameworks, serverless deployment, and built-in governance, Databricks Apps is designed to simplify and accelerate the development of impactful AI solutions.
In this guide, we’ll show you how to leverage the power of GenAI and Unity Catalog to build and deploy custom AI applications that can transform your business. Using Hugging Face models, Unity Catalog, Model Serving, and Databricks Apps, we’ll walk through creating and deploying a production-ready GenAI application—no advanced web app development experience required. By the end of this tutorial, you’ll learn how to unlock the potential of your data in Unity Catalog and turn complex AI models into practical, business-ready applications that drive productivity and innovation.
As an example, we created a GenAI application that combines two inputs: a picture and a text prompt. With the power of generative AI, the application transformed the original image based on the prompt, producing a unique and customized visual output.
In the sections below, we’ll guide you step-by-step through the process:
- Loading images into a Unity Catalog-managed volume
- Registering a Hugging Face model in Unity Catalog using MLflow
- Deploying the model with Model Serving
- Developing a Databricks App and embedding the model
Note: Databricks Apps is currently in Public Preview and may not yet be available in your region. For availability, check here.
Load the example image to Volume:
In Databricks, volume is a Unity Catalog object that provides governed storage for non-tabular data (like files, images, or documents). It allows organizations to securely store, access, and share various types of data while maintaining centralized governance and control.
For our example, we will download an image from Hugging Face and since we are manipulating images, we will save it to a Databricks volume:
The example image can be seen below:

Register the model from HuggingFace in Unity Catalog with MLflow:
First, we need to select a model from HuggingFace that can generate images based on a prompt and an input picture. Let's choose the Kandinsky 2-2 decoder model (https://huggingface.co/docs/diffusers/en/using-diffusers/img2img#image-to-image).
Next, we can register our model in the Unity Catalog using MLflow. We will use the MLflow pyfunc flavor to create a custom class, which will serve as our model wrapper:
We have added two functions (image_to_base64 and base64_to_image) to the class to encode and decode images. They are necessary because we cannot parse PIL images in JSON to submit our input to our deployed model.
After preparing our class, we will log and register the model in the Unity Catalog. The model will expect a DataFrame containing parameters, the prompt, and the image as input. We created an input example using our previously uploaded picture to our Volume.
Having registered our model in Unity Catalog, we are now ready to tackle the crucial deployment step through Model Serving. The next section will guide you through transforming your model into a production-ready service capable of handling real-time prediction requests at scale.
Deploy the model with Model Serving:
Model Serving in Databricks is a fully managed service that allows you to deploy machine learning models as REST APIs. This makes them easily accessible for real-time predictions without worrying about the underlying infrastructure or scaling. To learn more, please consult the resource available at this link.
We deploy a model registered on Unity Catalog with Model Serving:
- Either manually, using the UI: navigate to your model in Unity Catalog and click on “serve this model”
- Or, we can do it via the API, as shown in the code below
The building process of the model serving endpoint will start. Once up and running, we can navigate to the “Model Serving” section and click the endpoint to get the connection details.
Next, we can start creating our Databricks Apps.
Databricks Apps development
Databricks Apps is a new feature (check the documentation here) designed to simplify the creation and deployment of web applications within the Databricks Platform. With Databricks Apps, practitioners can build applications leveraging data, models, and governance already existing on Databricks without the need to manage a separate infrastructure. Databricks Apps provide flexibility, allowing you to build your App Front End with the framework of choice: Dash, Shiny, Gradio, Streamlit, or Flask.
To start creating the App in your Databricks Platform based on this page:
- Navigate to Compute > Apps in your Databricks Platform.
- Click "Create App". Leave the Advanced settings empty for now, as we will fill it in later in this section.
Next, set up your app environment:
- Go to your user profile and create a new folder for your app.
- This folder will contain your app code and any additional dependencies.
- In this folder, create:
- A file named main.py:
- In main.py, we will use a Personal Access Token (PAT) to access the model serving endpoint, retrieving it securely from a "secret scope" created via the Databricks CLI rather than displaying it directly.
- To find instructions on how to register a secret using Databricks CLI, navigate here.
- A file name requirements.txt:
- This file lists the external libraries and packages necessary for our code to function correctly.
- You can find further information about it in this link
- A file named main.py:
Now that we have completed the configuration, we will proceed with building the code for our WebApp.
Let's dive into the critical components of our application:
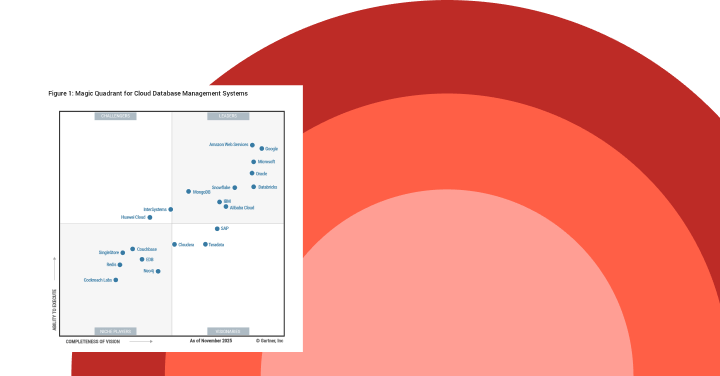
Gartner®: Databricks Cloud Database Leader
The Back-End: Handling interactions with Unity Catalog Volumes
The following code defines a function, query_image_from_volume(), that retrieves an image file from a Databricks Volume. It uses the Databricks SDK to authenticate and download the image file, then opens it using the PIL (Python Imaging Library) and converts it to RGB format. The function sets up the necessary environment variables, including a secret token for authentication, before fetching and processing the image.
Model Endpoint Integration: Querying our AI model for predictions
Below, we define a function query_model_endpoint that prepares and sends a request to our model endpoint (deployed previously with Model Serving) for image generation. It takes an input image, converts it to base64 (because a PIL image cannot be directly serialized in JSON), constructs a DataFrame with various parameters, including the image and prompts, and sends this data as a JSON payload to the model endpoint URL. Finally, it processes the response by converting the returned base64 image data into an RGB image object so that we can visualize the result in our App.
The URL of your model can be found in the Model Serving UI by clicking on your deployed model.
Front-End Development: Combining back-end functionality and model queries into a user interface
In this section, we create a Gradio interface for our GenAI app that transforms images based on user input. It sets up a layout with a logo, title, input textbox for character description, and two image displays (before and after transformation), along with buttons to run the transformation and clear the inputs. The interface connects the user input to our function query_model_endpoint defined previously, which processes the input and generates the results, which will be then displayed in the "After" image component.
If you want to add pictures or logs to your WebApp, you can create another folder (called "static" in our code above) within the same directory to store the pictures (as we have done here with static/DatabricksLogo_full3.png).
Deployment: Getting our app up and running
This code snippet is typically used at the end of a Gradio application script. It checks if the script is being run directly (not imported as a module) using the if __name__ == "__main__": condition. If true, it launches the Gradio interface defined in the demo object. The application is at first deployed in local host. If you want to make it accessible through a public URL, you will have to add share=True in launch().
With our Databricks App developed and ready for deployment, we have successfully created a powerful, interactive interface for our GenAI model. However, before we can unleash its potential, we must address a crucial app management aspect: permissions.
In the next section, we will explore how to grant the necessary permissions to the Service Principal behind our Databricks App, ensuring it has the right level of access to perform its functions securely and effectively.
Databricks Apps Permissions:
You can find the name of the service principal in your App UI, under the section App resources. Once identified, grant the following permissions to the Service Principal:
- Personal Access Token:
- Grant Can Read permission to allow the Service Principal to access the registered token
- Following the instructions in this link, you can grant access directly to the UI:
- Click Edit, Advanced settings, the Resource type “Secret” and the scope and secret-key in which you have registered your token.
- To reference the secret in your app code, use the value of the name field (TOKEN in our example) to refer to the configured key value, and save.
- Volume Access:
- Assign READ_VOLUME permission to enable access to pictures stored in your Volume.
- Through the Volume UI:
- On your Volume, click Permissions and select Grant
- Model Serving Endpoint:
- Provide CAN USE permission for the previously deployed model in Model Serving.
- Through the Model Serving UI:
- On your model’s page, click Permissions
To deploy our WebApp, navigate to your WebApp UI and click Deploy. Then, select the folder where your main.py is located. This will deploy your code in an isolated container. The application's initial deployment may require several minutes to complete. Once the process concludes and the status indicator displays "Running," your application is fully deployed and operational.
Upon successful deployment, you will have access to a fully functional, interactive user interface within a web application that utilizes the Kandinsky model. To launch your application:
- Navigate to the Compute section in your Databricks workspace
- Locate and click your application name
- Find the "Running" status indicator
- Click the adjacent link to open your application
Here are the results of our example in our Databricks App:
Get Started with Databricks Apps
As demonstrated, the steps are clear and straightforward. Most of the work is done within the Databricks Intelligence Platform, significantly reducing complexity and development time. This approach allows you to quickly and simply deploy your model in a serverless web application without the traditional hurdles of infrastructure management.
We hope you found this helpful tutorial as we wrap up this journey. We encourage you to explore these capabilities further and see how they can accelerate your AI initiatives. With the help of this blog, you can take your App to the next level by fine-tuning the model, allowing you to personalize your app even further to meet your specific requirements. This customization will enable you to create AI solutions that are truly tailored to your organization's needs, potentially revolutionizing your business processes and driving innovation.
We wish you success in building your own GenAI web app and are excited to see the fantastic GenAI web apps you will create!