Managed MLflow Now Available on Databricks Community Edition
Free Edition has replaced Community Edition, offering enhanced features at no cost. Start using Free Edition today.
In February 2016, we introduced Databricks Community Edition, a Community Edition for big data developers to learn and get started quickly with Apache Spark. Since then our commitment to foster a community of developers remains steadfast: to date, we have over 150K registered Community Edition users; we have trained thousands of people at meetups and Spark + AI Summits, and other open-source events.
Today, we are excited to extend Databricks Community Edition with hosted MLflow for free, as part of our ongoing commitment to help developers learn about machine learning lifecycle. With the Community Edition, you can try tutorials that demonstrate how to track results and experiments as you build machine learning models—a crucial stage in the machine learning model’s development lifecycle.
MLflow is an open-source platform for the machine learning lifecycle with four components: MLflow Tracking, MLflow Projects, MLflow Models, and MLflow Registry. MLflow is now included in Databricks Community Edition, meaning that you can utilize its Tracking and Model APIs within a notebook or from your laptop just as easily as you would with managed MLflow in Databricks Enterprise Edition.
In this blog, we briefly explain how you can use MLflow in Community Edition. We’ll share an example notebook that trains a Keras/TensorFlow model and run it within Databricks Community Edition, followed by how to run GitHub examples on your laptop and log results remotely on Databricks Community Edition.
Run Experiments within Community Edition Workspace
First, register for Community Edition. Then, create a cluster with ML Runtime 6.0, which ships with a pre-configured ML environment including mlflow, Keras, PyTorch, TensorFlow, and other libraries. With any other Runtime, you'll have to install the mlflow library or run dbutils.library.installPyPI(“mlflow”) in one of the first cells of your notebook.
Creating an Experiment in your Workspace
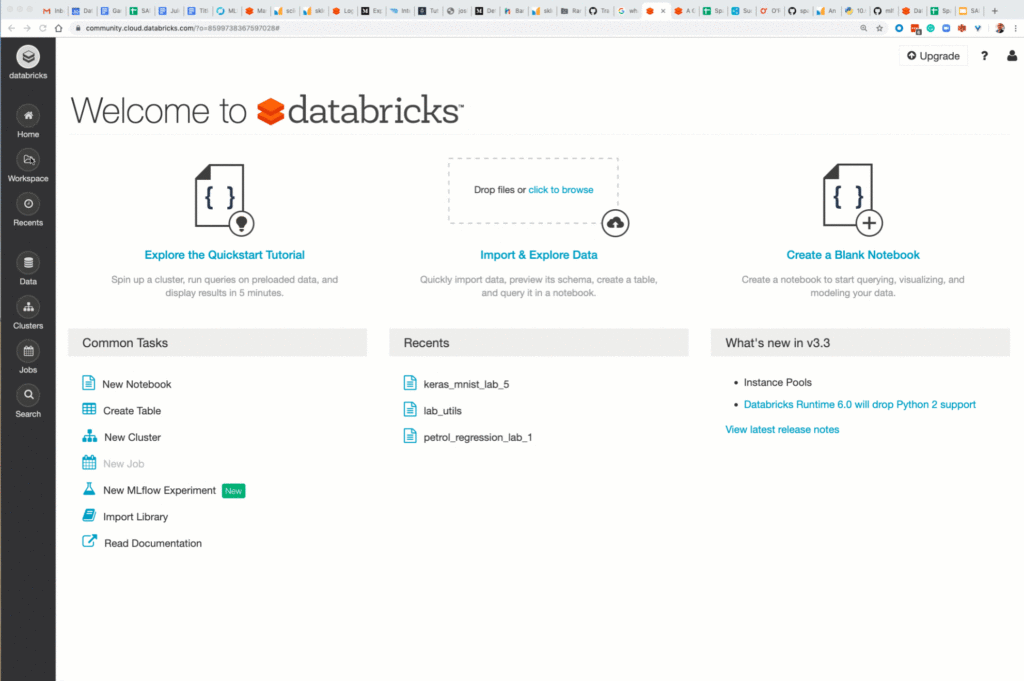
When in a notebook, MLflow will automatically log results to an experiment associated with the notebook. You can also explicitly create an experiment under which all your model training runs and results are tracked, as shown below:
Logging Runs in your Default Notebook Experiment
While running your MLflow code within a notebook, the runs will be logged to a default experiment associated with the notebook. Alternatively, you can explicitly set an experiment name with mflow.set_experiment(“path_to_experiment_name”), to aggregate and compare runs across multiple notebooks.
Under this workspace and default experiment name, we will train a Keras MNIST model with various regularization parameters—such as the number of epochs, hidden layers, units per layer, batch size, momentum, dropout, and activation function. We can run a few experiments with different regularization parameters and select the best model with the lowest validation loss and highest accuracy.
Creating an MLflow Session with the Tracking Server
By using the mlflow.start_run(run_name=run_name), we automatically initiate a session with the tracking server, while the mlflow.keras.autolog() will pick up this current active run session and automatically log parameters, metrics, tags, and model. Below is an excerpt of the code from the notebook, which you can import into Community Edition.
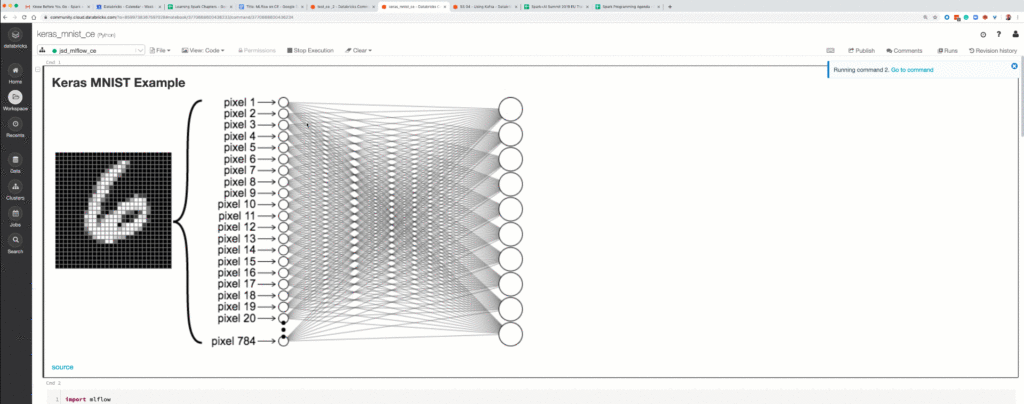
As you can see from the above, the tracking experiment runs within a Community Edition is relatively simple. With a few lines of code, you can use the MLflow Tracking and Model APIs to generate runs in your notebook and visualize their parameters and metrics for evaluation.
This step is an important stage in your model development life cycle.
Run Experiments Locally and Track Results on Community Edition
You can also run experiments on your laptop or local machine, tracking results to the Community Edition. Only after configuring your local environment and registering for a Community Edition can you track results remotely.
Configuring your Local Environment
pip install mlflow(as described in the MLflow quickstart guide)- As above, create an experiment in your workspace and get its path.
- Create a credentials file via
databricks configureCLI (and answer the prompts)- Databricks Host (should begin with https://): https://community.cloud.databricks.com
- Username: enter your login credentials
- Password: enter password for Community Edition
- Configure MLflow to communicate with the Community Edition server:
export MLFLOW_TRACKING_URI=databricks - Test out your configuration by creating an experiment via the CLI:
mlflow experiments create -n /Users//my-experiment
After the above steps, you can run any Python, Java, or R script containing your machine learning and MLflow code locally and track the results on the MLflow Tracking Server hosted on Community Edition. In addition to the above steps, set the MLFLOW_EXPERIMENT_NAME environment variable to the experiment created above, or in Python:
For this experimental run, we are going to add the above lines to the examples/sklearn_elasticnet_diabetes/osx/train_diabetes.py from the MLflow GitHub Repository in our cloned repo.
Let’s execute three separate runs, each with different parameters on our laptop. With each run, the results will be logged on our Community Edition server under the experiment created above.
python train_diabetes.py 0.01 0.01 && python train_diabetes.py 0.01 0.75 && python train_diabetes.py 0.01 1.0
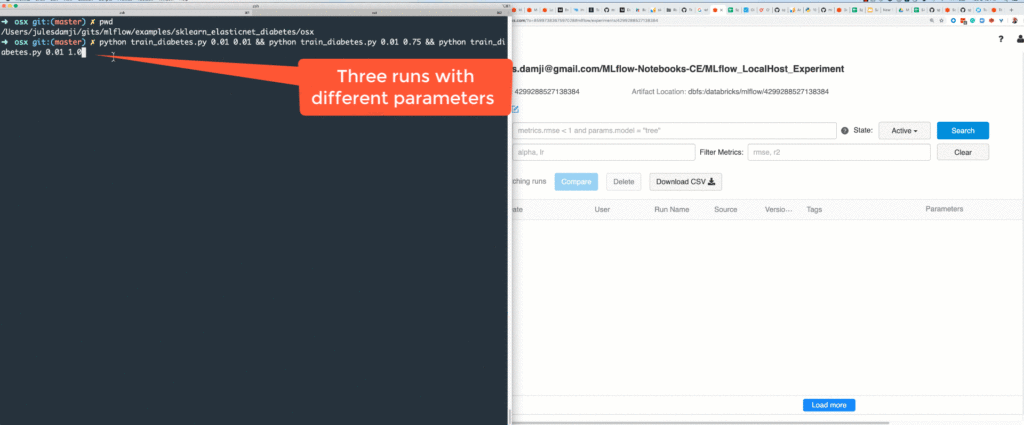
As shown in the animation above, when the code is executed locally, the runs’ results are logged remotely on the MLflow Tracking Server hosted on your Community Edition.
Or you could simply cut-and-paste this simple code into your favorite editor and run from your laptop, after configuring the laptop with Databricks MLflow credentials:
Summary
To recap, MLflow is now available on Databricks Community Edition. As an important step in machine learning model development stage, we shared two ways to run your machine learning experiments using MLflow APIs: one is by running in a notebook within Community Edition; the other is by running scripts locally on your laptop and logging results to the tracking server hosted on Community Edition.
Intended for rapid experimentation and learning, the MLflow server on Community Edition is not designed for production use. For example, it does not include the ability to run and reproduce MLflow Projects. And its scalability and uptime guarantees are limited.
Since its original release in February 2016, Community Edition has proved a useful tool for learning about Apache Spark, data science, and data engineering. We’re happy to extend it to learn about managing the machine learning lifecycle with MLflow.
What’s Next
To get started, try some examples from the MLflow GitHub repository on your laptop. These Python scripts (quickstart/mlflow_tracking.py and sklearn_elasticnet_wine/train.py) are a good start to train models locally on your laptop and track remotely on the Community Edition. Or import and run this notebook in your Community Edition.
Join the MLflow community and download the latest MLflow 1.3. Finally, after using MLflow, feel free to contribute.
Read More
If you are new to MLflow, read the MLflow quickstart. For production use cases, read about Managed MLflow on Databricks.
Never miss a Databricks post
What's next?
Data Science and ML
October 1, 2024/5 min read
Build Compound AI Systems Faster with Databricks Mosaic AI

Healthcare & Life Sciences
November 14, 2024/2 min read