TensorFlow™ on Databricks
Distributed Computing with TensorFlow
TensorFlow supports distributed computing, allowing portions of the graph to be computed on different processes, which may be on completely different servers! In addition, this can be used to distribute computation to servers with powerful GPUs, and have other computations done on servers with more memory, and so on. The interface is a little tricky though, so let’s build from scratch.
Here is our first script, that we will run on a single process, and then move to multiple processes.
By now, this script shouldn’t scare you too much. We have a constant, and three basic equations. The result (238) gets printed at the end.
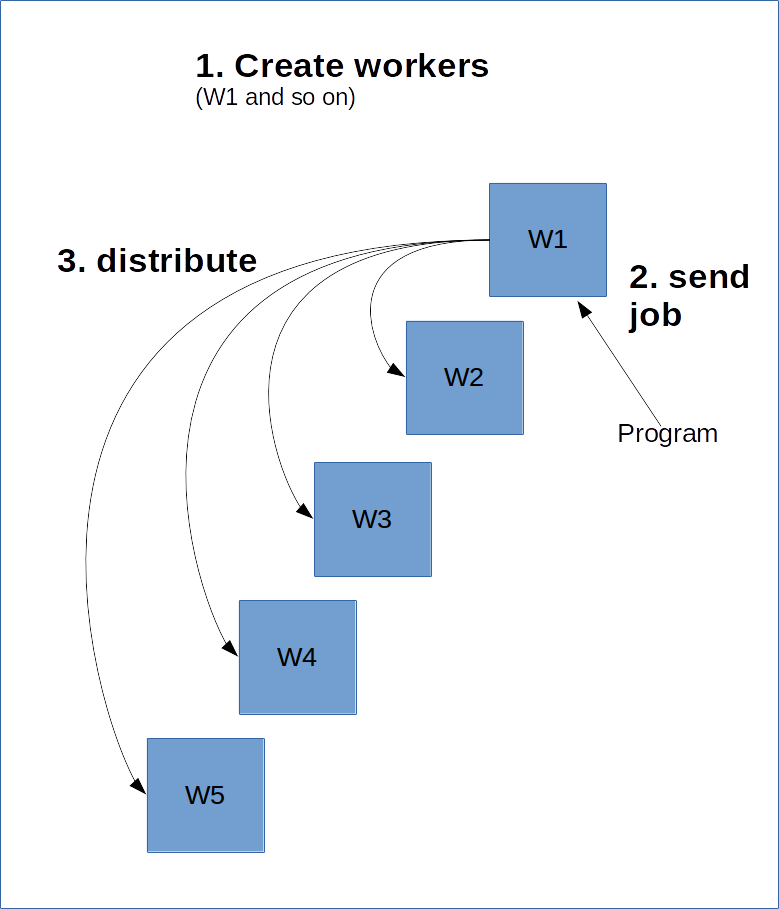
TensorFlow works a bit like a server-client model. The idea is that you create a whole bunch of workers that will perform the heavy lifting. You then create a session on one of those workers, and it will compute the graph, possibly distributing parts of it to other clusters on the server.
In order to do this, the main worker, the master, needs to know about the other workers. This is done via the creation of a ClusterSpec, which you need to pass to all workers. A ClusterSpec is built using a dictionary, where the key is a “job name”, and each job contains many workers.
Below is a diagram of what this would look like.

The following code creates a ClusterSpect with a job name of “local” and two worker processes.
Note that these processes are not started with this code, just a reference is created that they will be started.
Next up, we start the process. To do this, we graph one of these workers, and start it:
The above code starts the “localhost:2223” worker under the “local” job.
Below is a script that you can run from the command line to start the two processes. Save the code on your computer as create_worker.py and run with python create_worker.py 0 and then python create_worker.py 1. You’ll need separate terminals to do this, as the scripts do not finish by their own (they are waiting for instructions).
After doing this, you’ll find the servers running on two terminals. We are ready to distribute!
The easiest way to “distribute” the job is to just create a session on one of these processes, and then the graph is executed there. Just change the “session” line in the above to:
Now, this doesn’t really distribute as much as it sends the job to that server. TensorFlow may distribute the processing to other resources in the cluster, but it may not. We can force this by specifying devices (much like we did with GPUs in the last lesson ):
Now we are distributing! This works by allocating tasks to workers, based on the name and task number. The format is:
/job:JOB_NAME/task:TASK_NUMBER
With multiple jobs (i.e. to identify computers with big GPUs), we can distribute the processing in many different ways.
Map and Reduce
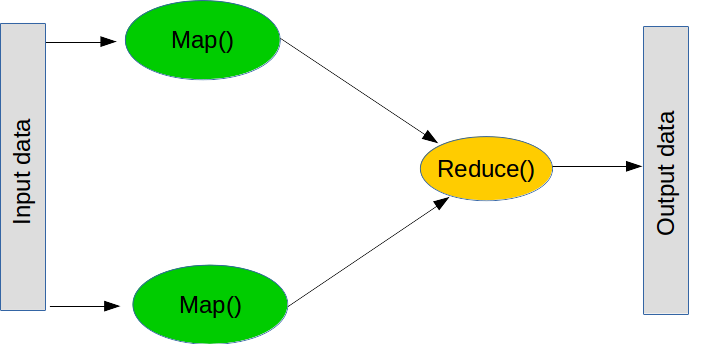
MapReduce is a popular paradigm for performing large operations. It is composed of two major steps (although in practice there are a few more).

The first step is known as a map, which means “take this list of things, and apply this function to each of them”. You can do a map in normal python like this:
The second step is a reduce, which means “take this list of things, and combine them using this function”. A common reduce operation is sum - i.e “take this list of numbers and combine them by adding them all up”, which can be performed by creating a function that adds two numbers. What reduce does is takes the first two values of the list, performs the function, takes the result, and then performs the function with the result and the next value. For sum, we add the first two numbers, take the result, add it with out next number, and so on until we hit the end of the list. Again, reduce is part of normal python (although it isn’t distributed):
Note that you should never really need to use reduce -- just use a for loop.
Back to distributed TensorFlow, performing map and reduce operations is a key building block of many non-trivial programs. For example, an ensemble learning may send individual machine learning models to multiple workers, and then combine the classifications to form the final result. Another example is a process that
Here is another basic script that we will distribute:
Converting to a distributed version is just an alteration of the previous conversion:
You’ll find distributing computation a much easier process if you think of it in terms of maps and reduces. First, “How can I split this problem into subproblems that can be solved independently?” - there is your map. Second, “How can I combine the answers to form a final result?” - there is your reduce.
In machine learning, the most common method for the map is simply to split your datasets up. Linear models and neural networks are often quite good at this, as they can be individually trained and then combined later on.
1) Change the word “local” in the ClusterSpec to something else. What else do you need to change in the script to get it working?
2) The averaging script currently relies on the fact that the slices are the same size. Try it with different sized-slices and observe the error. Fix this by using tf.size and the following formula for combining averages from slices:
3) You can specify a device on a remote computer by modifying the device string. As an example “/job:local/task:0/gpu:0” will target the GPU on the local job. Create a job that utilises a remote GPU. If you have a spare second computer handy, try to do this over the network.